
Setting Up Your Organization or Agency
A step-by-step walkthrough of registering for the JSX Agency Portal, from your first visit through adding the agents who will book for your customers.
Before You Start
Registration takes a few minutes. Have the following ready before you begin.
Find the Agency Portal Page
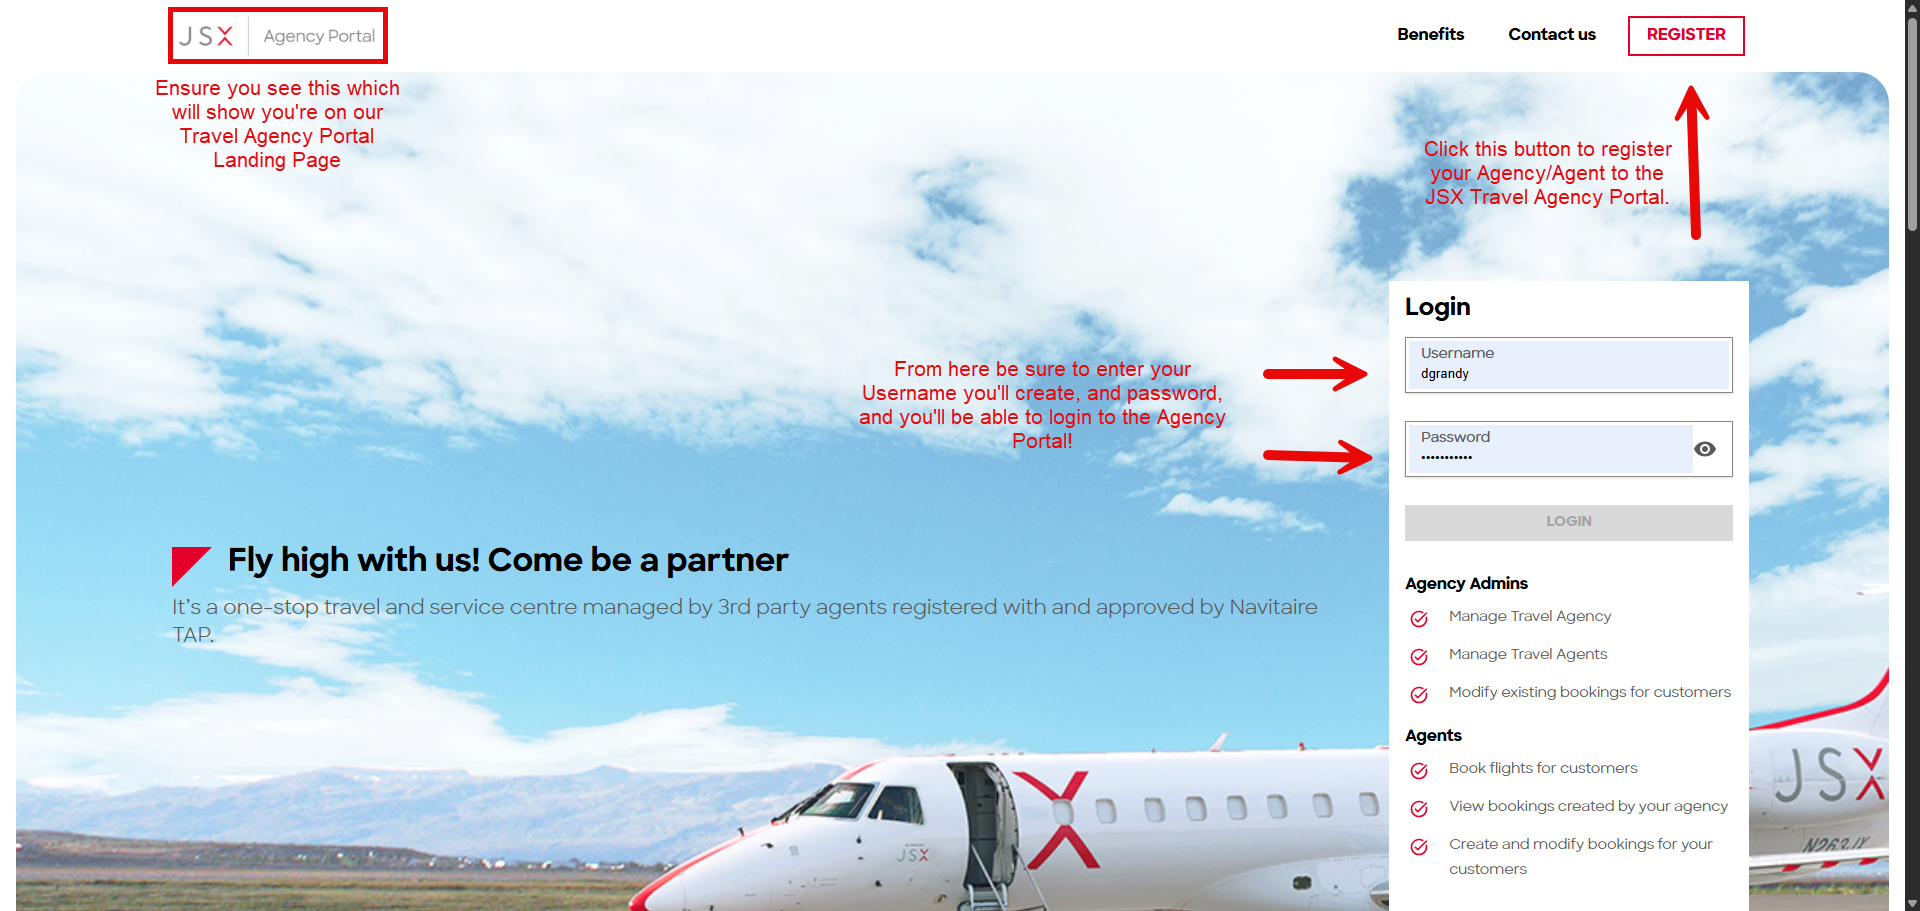
Confirm you are on the JSX Travel Agency Portal landing page. To register your organization or agency, click Register at the top right.
Once you have been approved, this is also where you will sign in: enter the username you created and your password, then click Login.
Step 1 — Entity Details
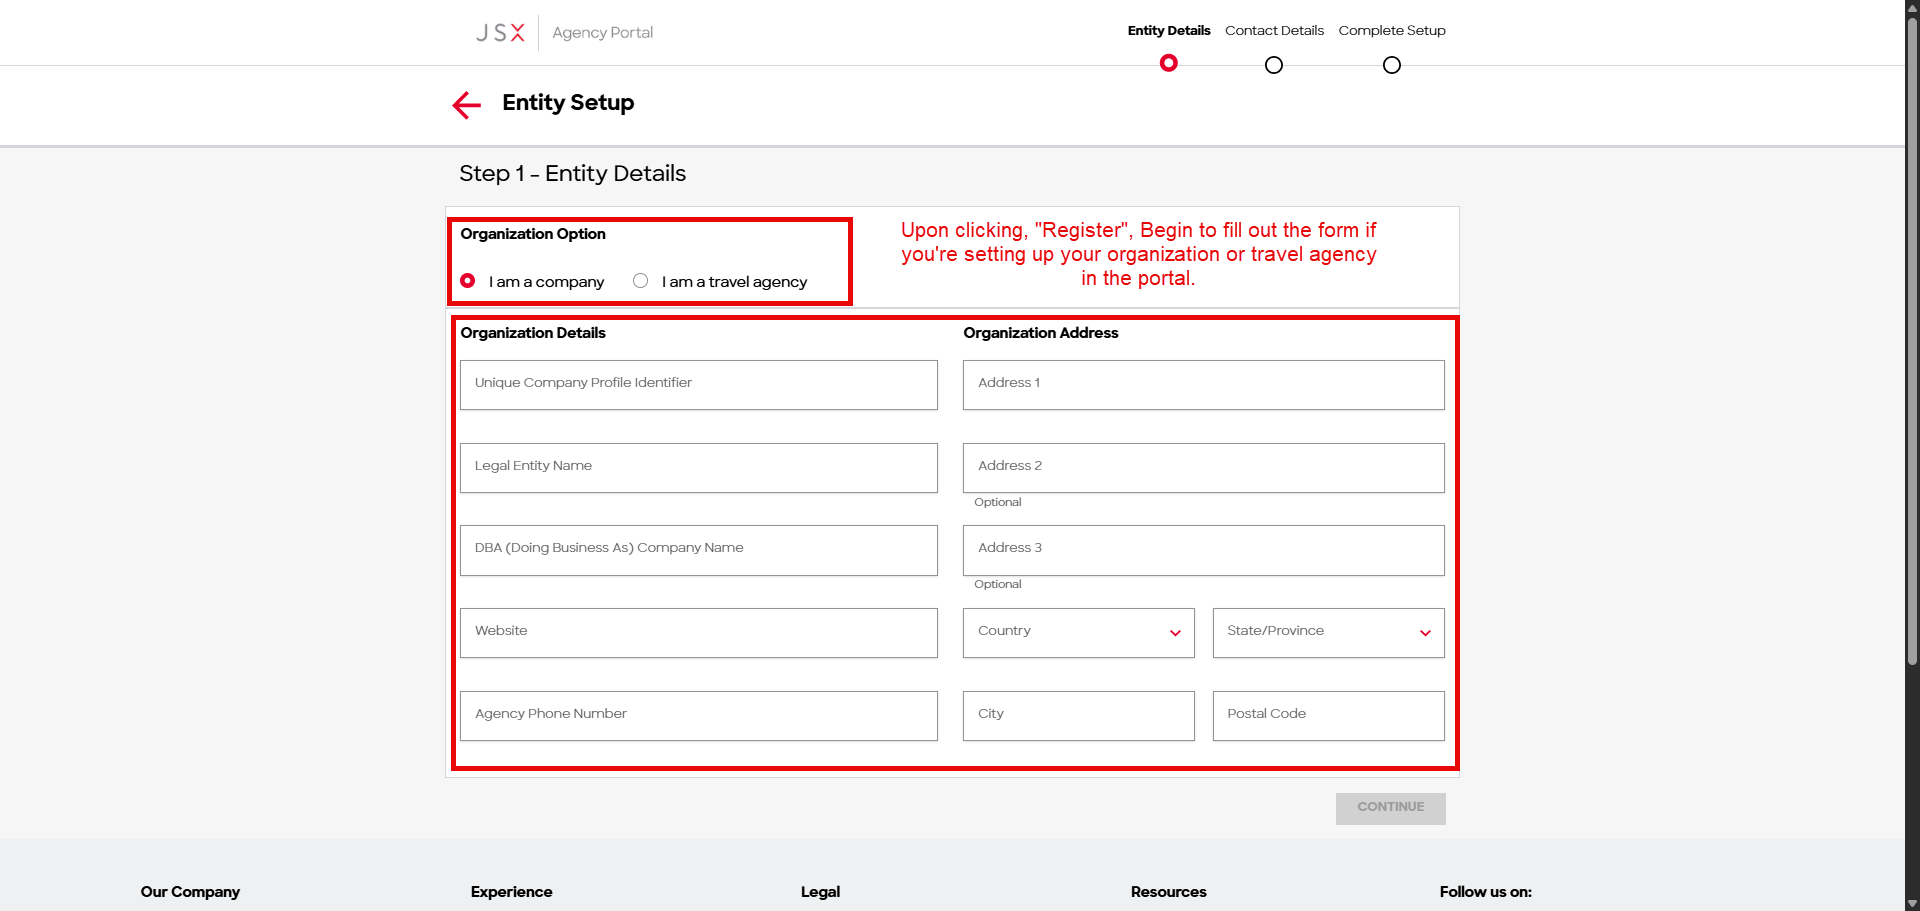
Start by choosing your Organization Option: I am a company or I am a travel agency. Your choice changes one field in the form below, so pick it first. Then fill in your organization details and address.
If You Are Registering a Company
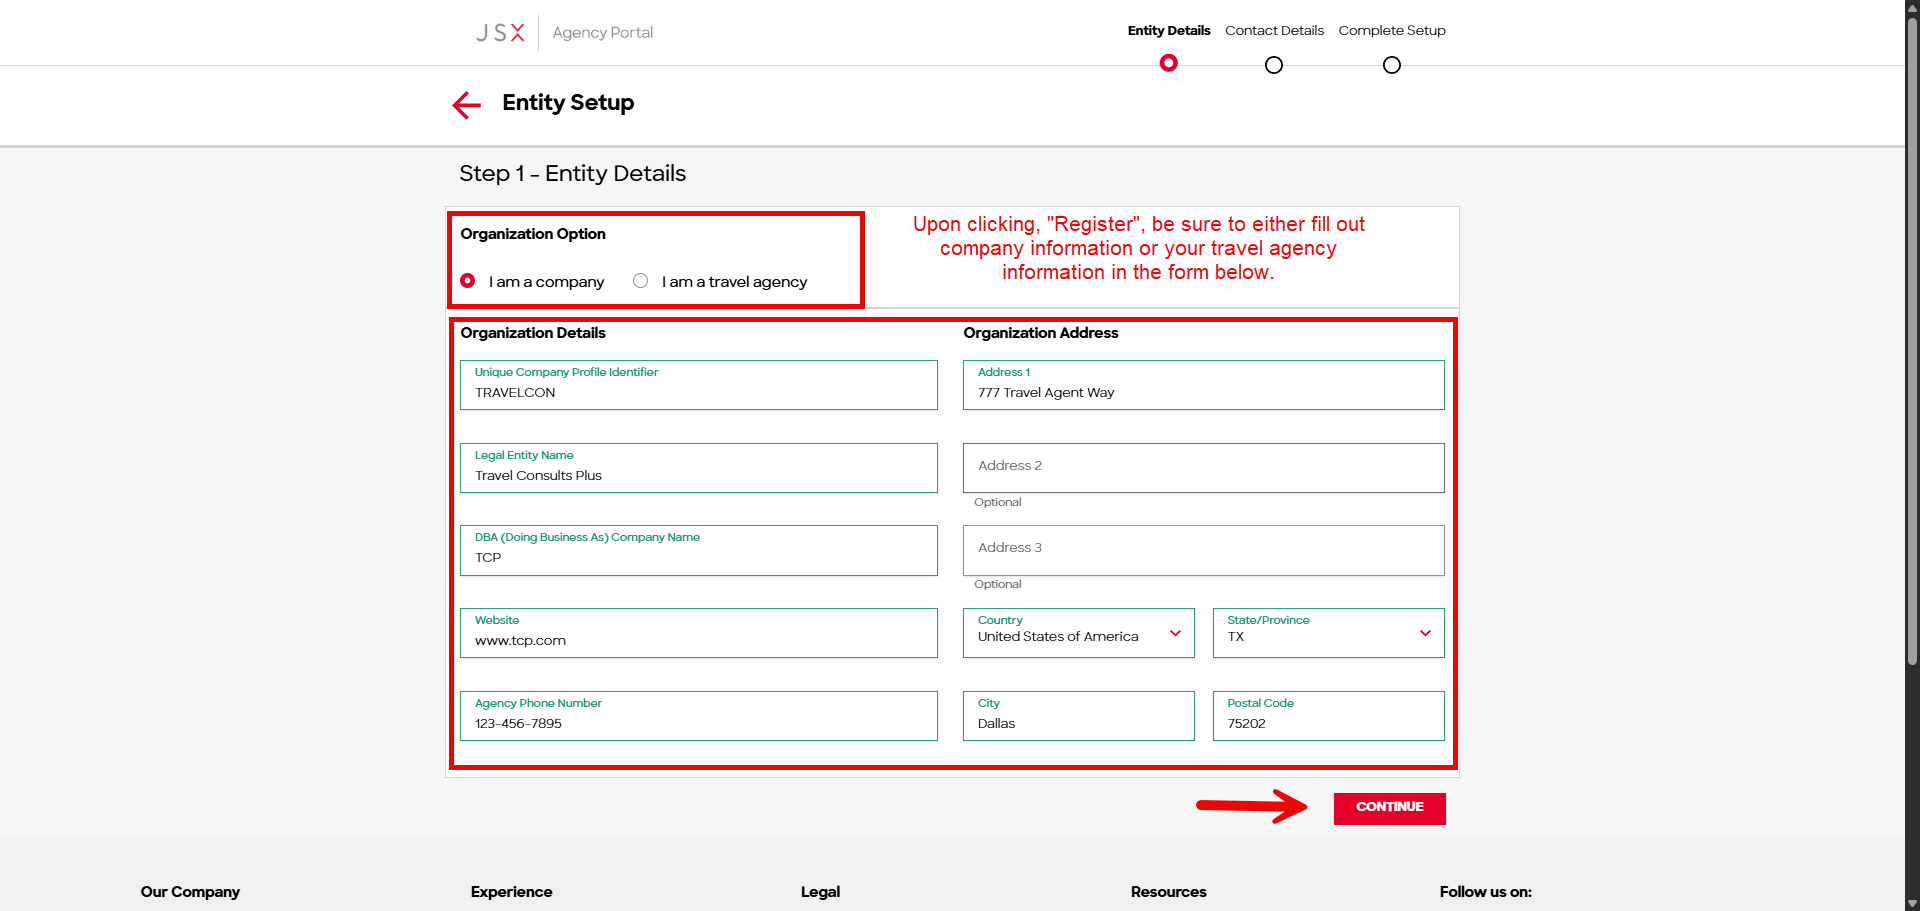
Select I am a company and enter your Unique Company Profile Identifier along with your legal entity name, DBA name, website, and phone. Address 2 and Address 3 are optional. Click Continue when the form is complete.
If You Are Registering a Travel Agency
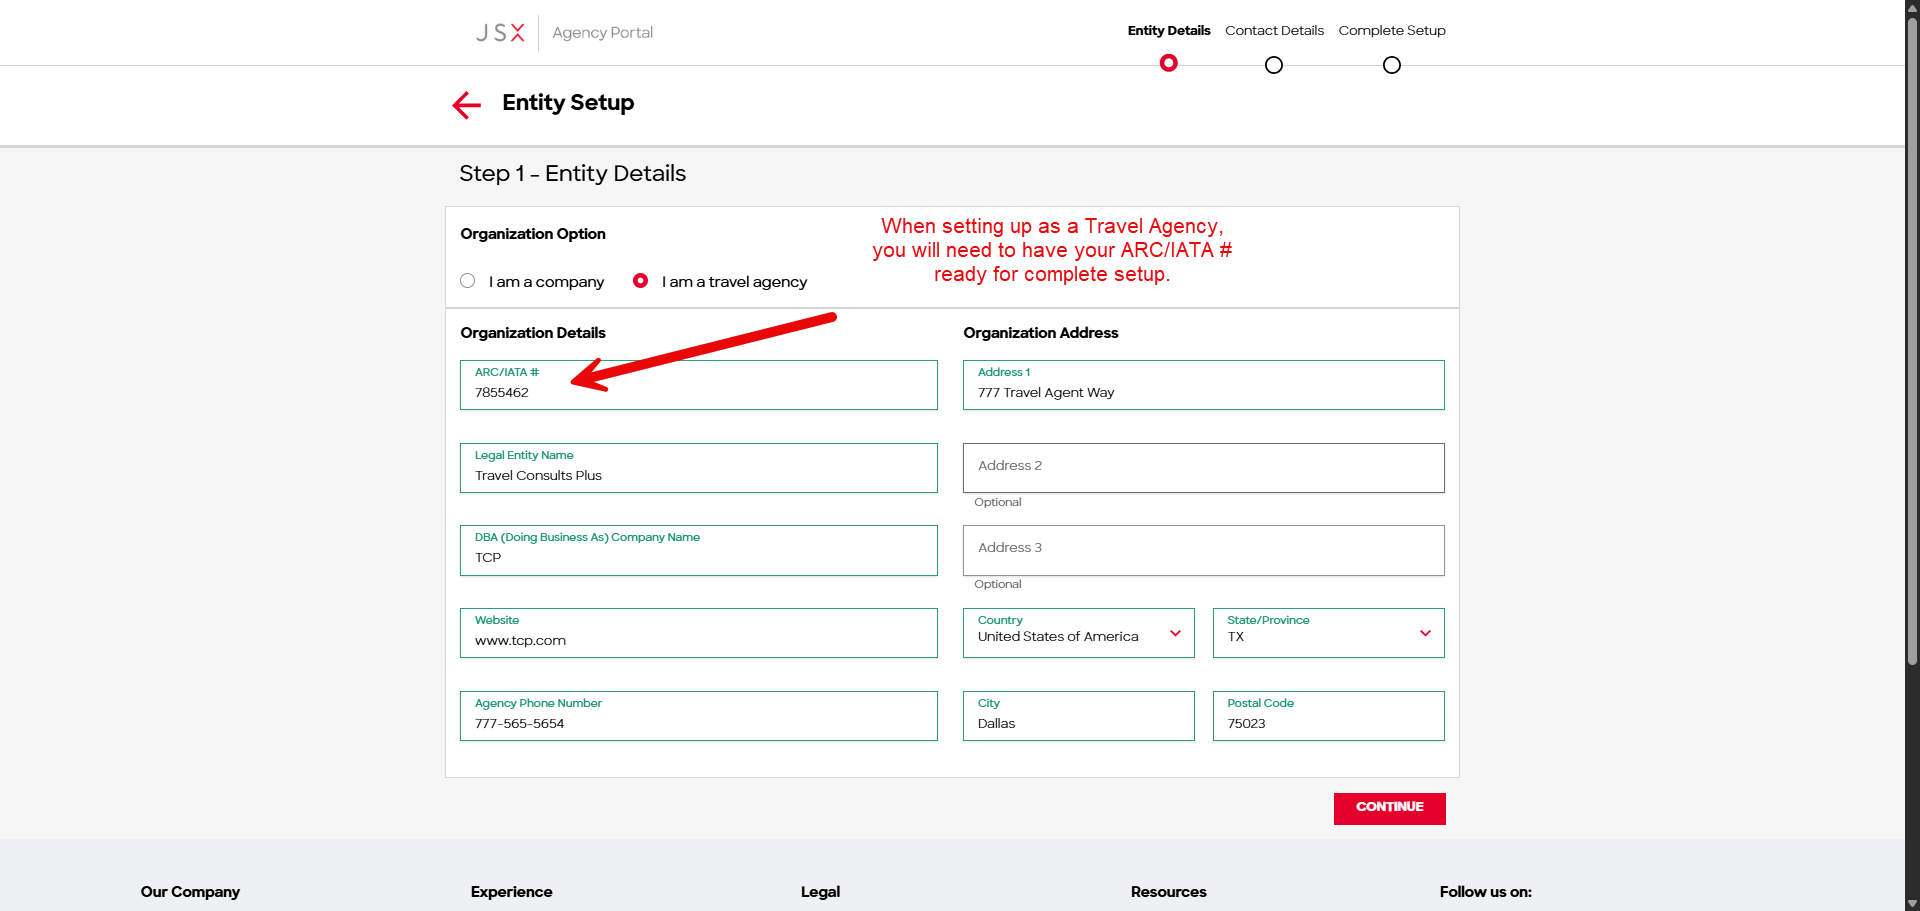
Select I am a travel agency. The first field becomes ARC/IATA # — have that number ready, as setup cannot be completed without it. The remaining fields are the same. Click Continue.
Step 2 — Contact Details
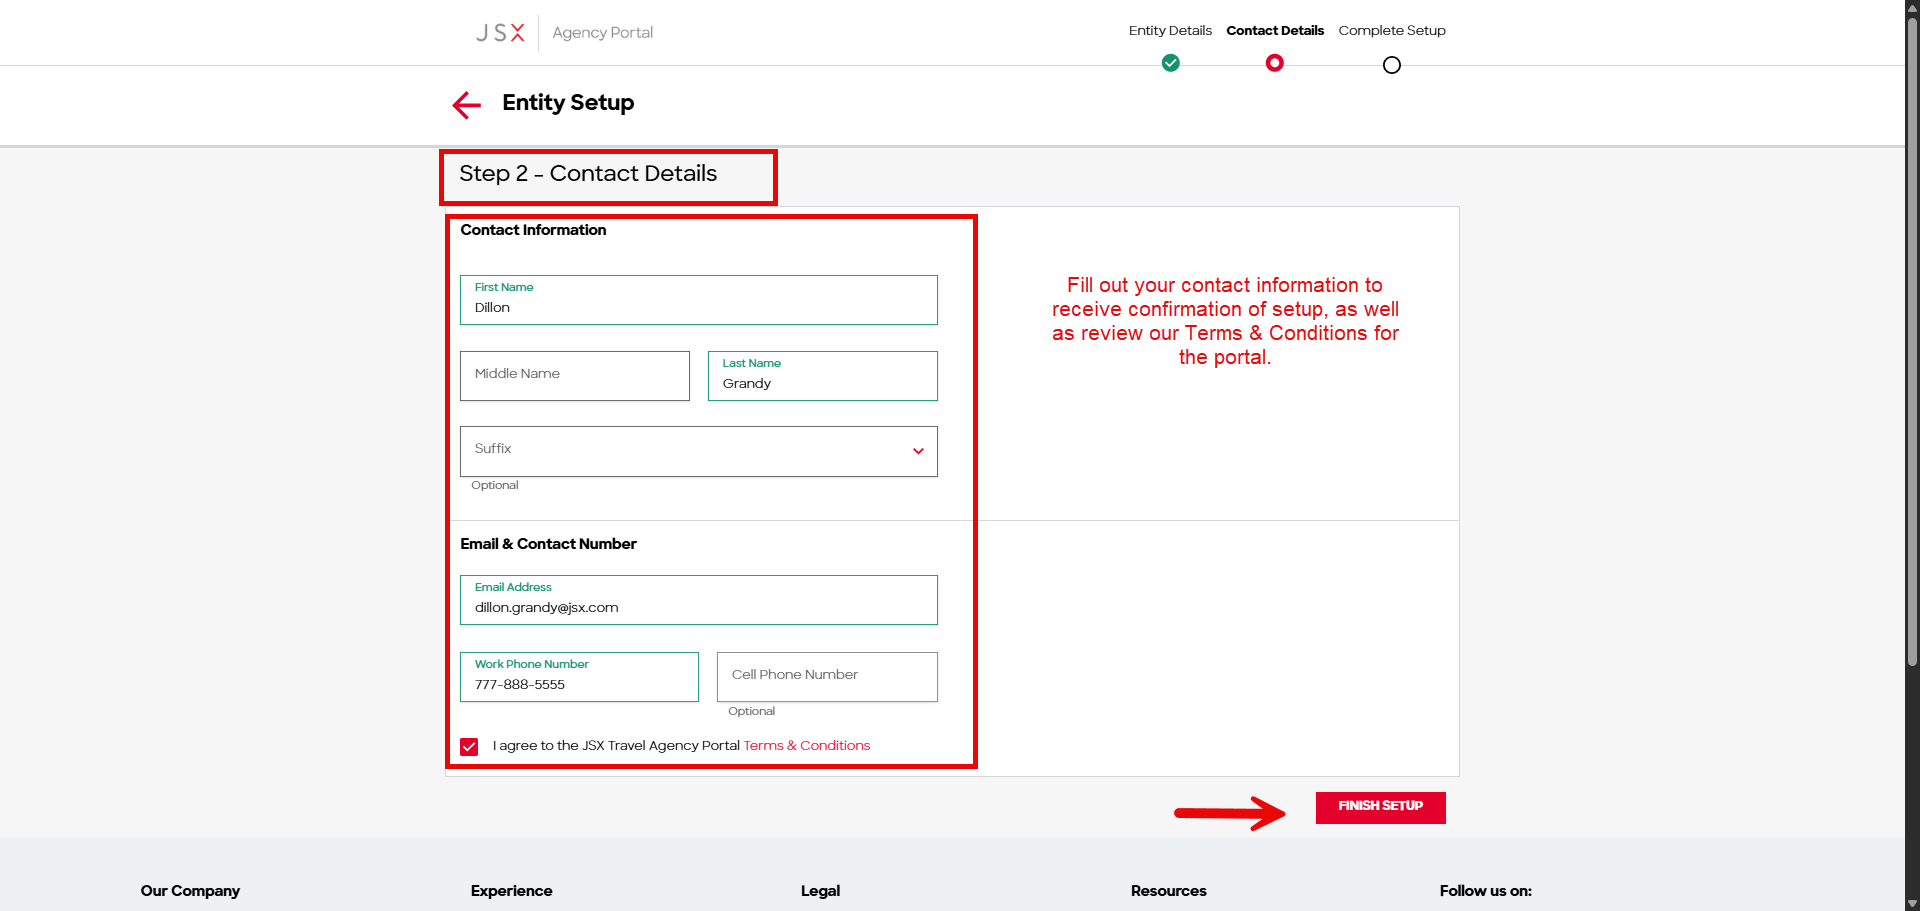
Fill out your contact information. This is the email address that receives confirmation of your setup. Review and agree to the JSX Travel Agency Portal Terms & Conditions, then click Finish Setup.
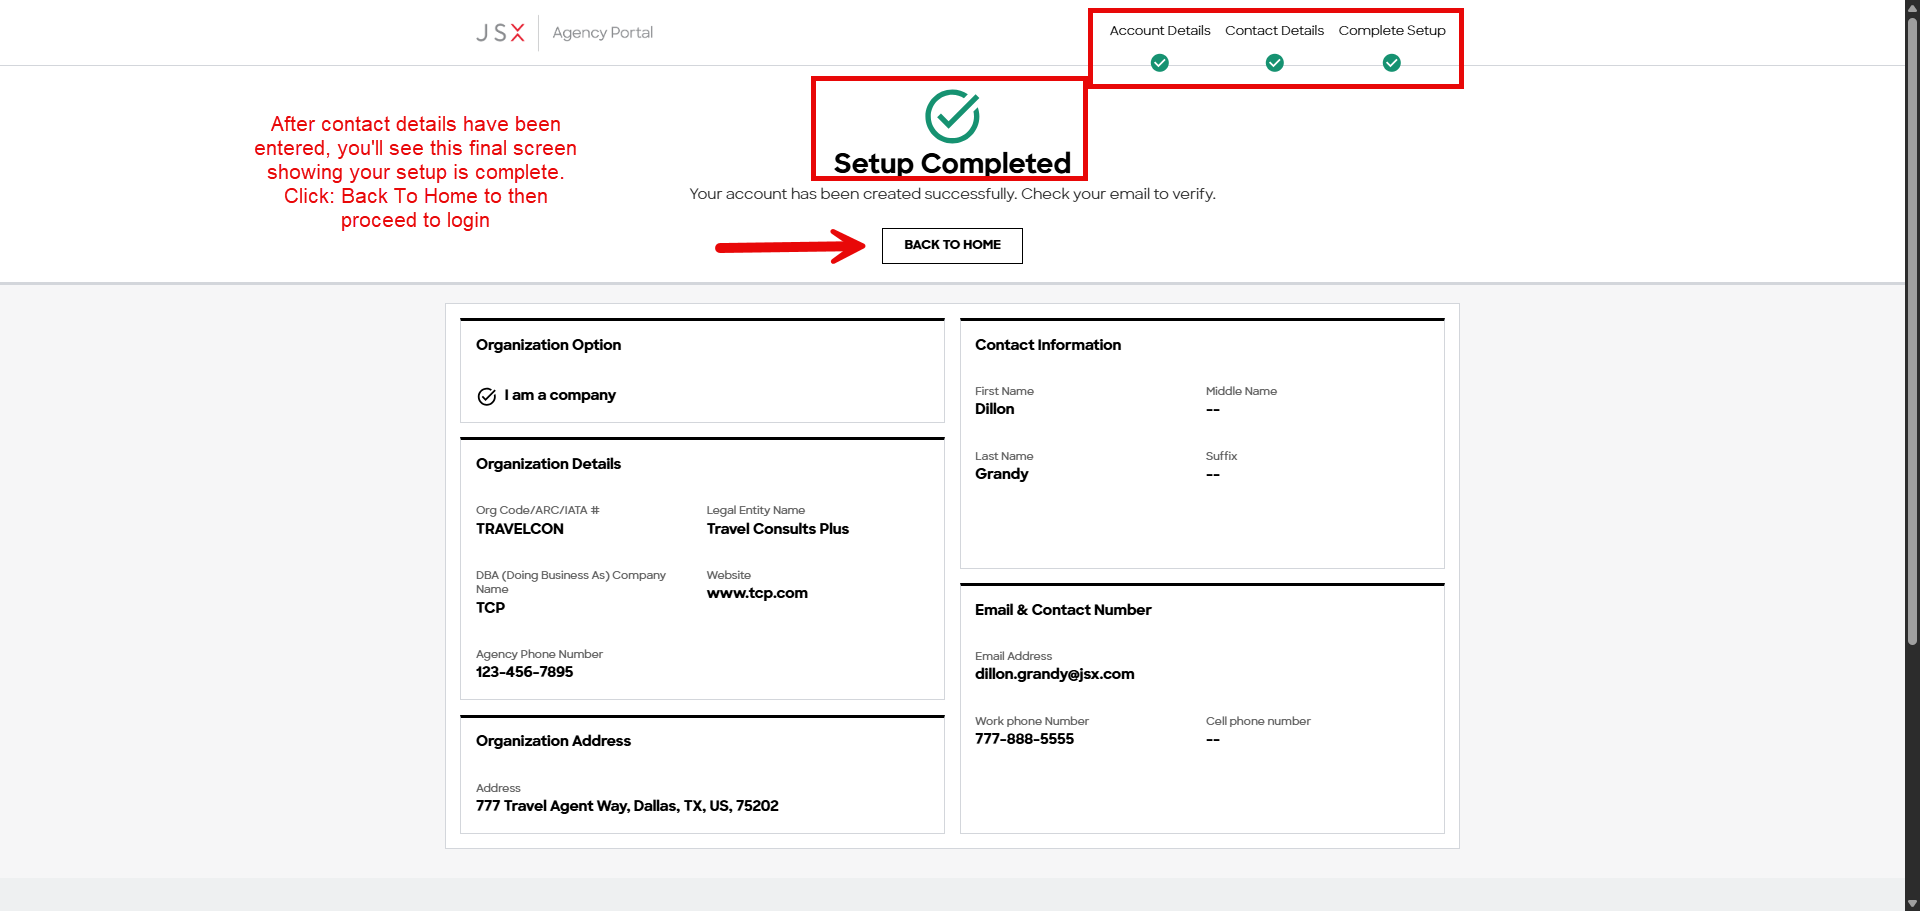
Setup Completed
You will see this screen once your details have been submitted. It summarizes everything you entered. Click Back To Home to return to the portal landing page.
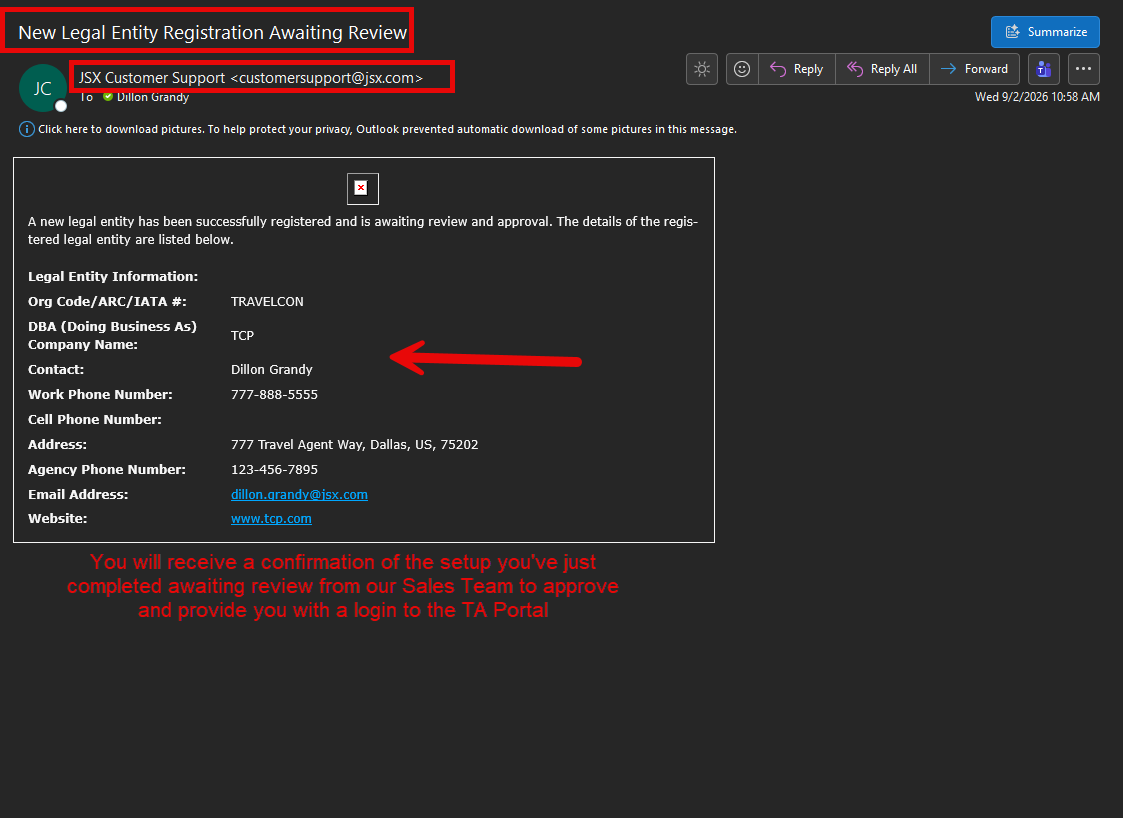
Review & Approval
You will receive a confirmation email of the registration you just completed. Our Sales team reviews it, approves the account, and provides you with a login to the Agency Portal.
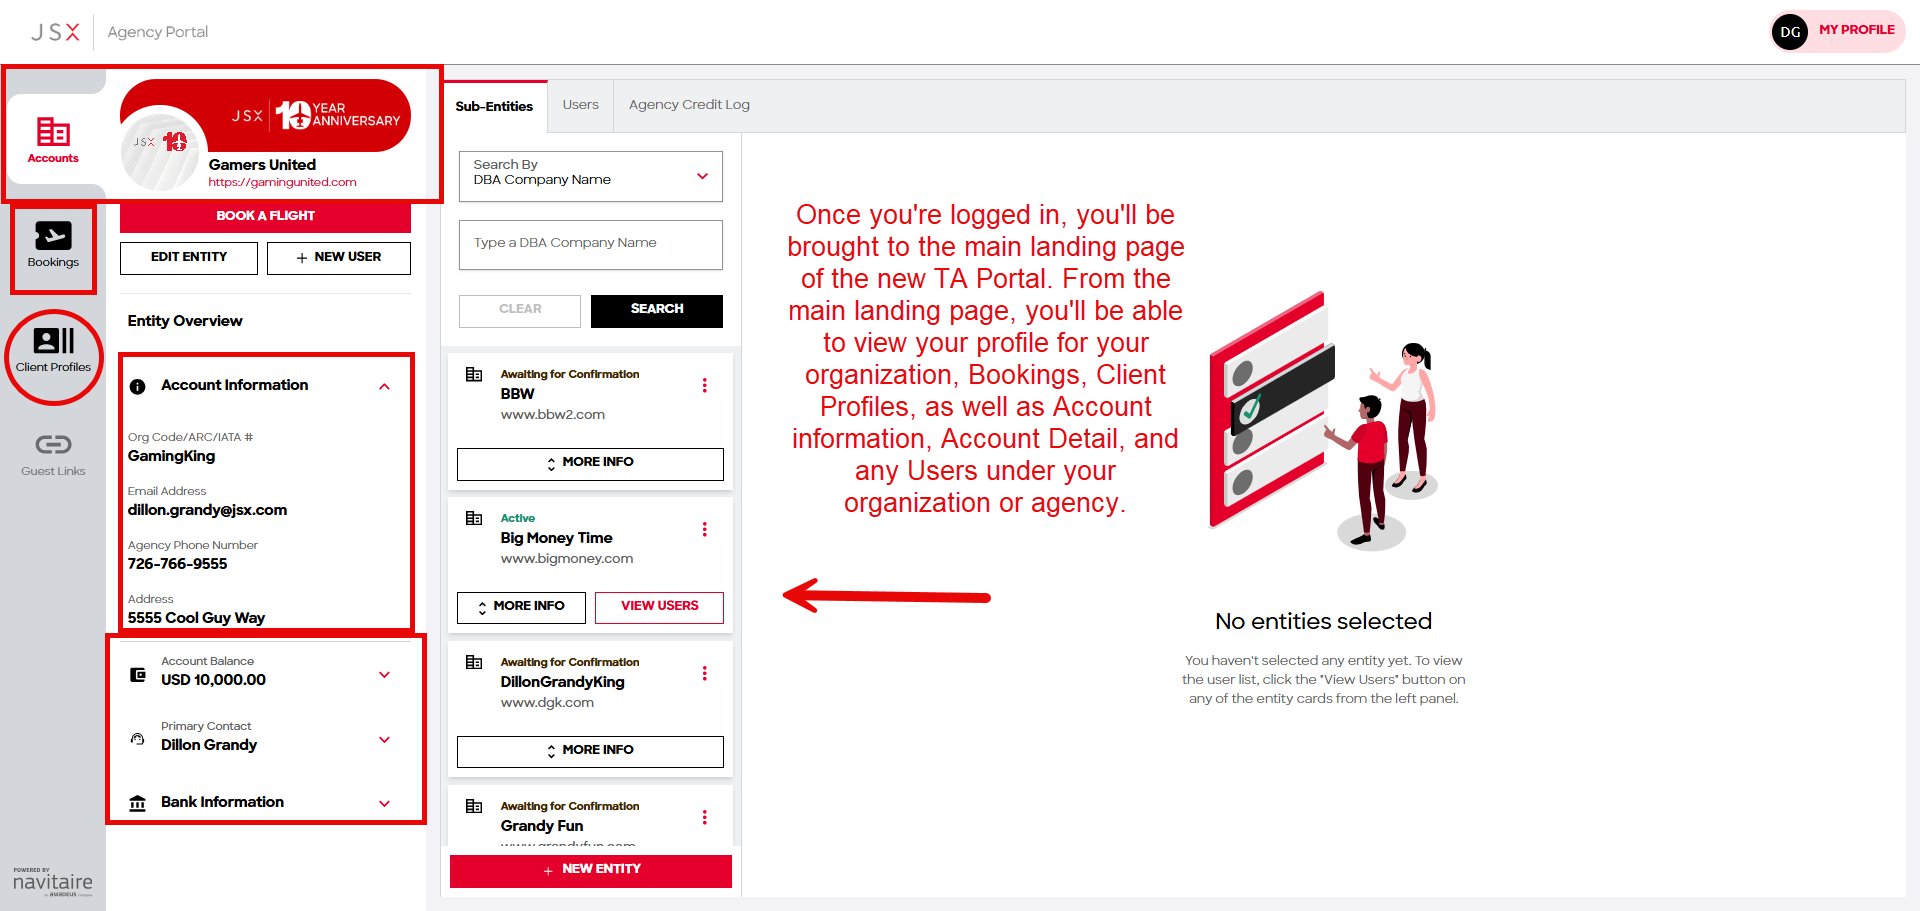
Your First Login
Signing in brings you to the main landing page of the Agency Portal. From here you can:
- View the profile for your organization, including Account Information and Account Detail
- Review Bookings and Client Profiles
- See any users under your organization or agency
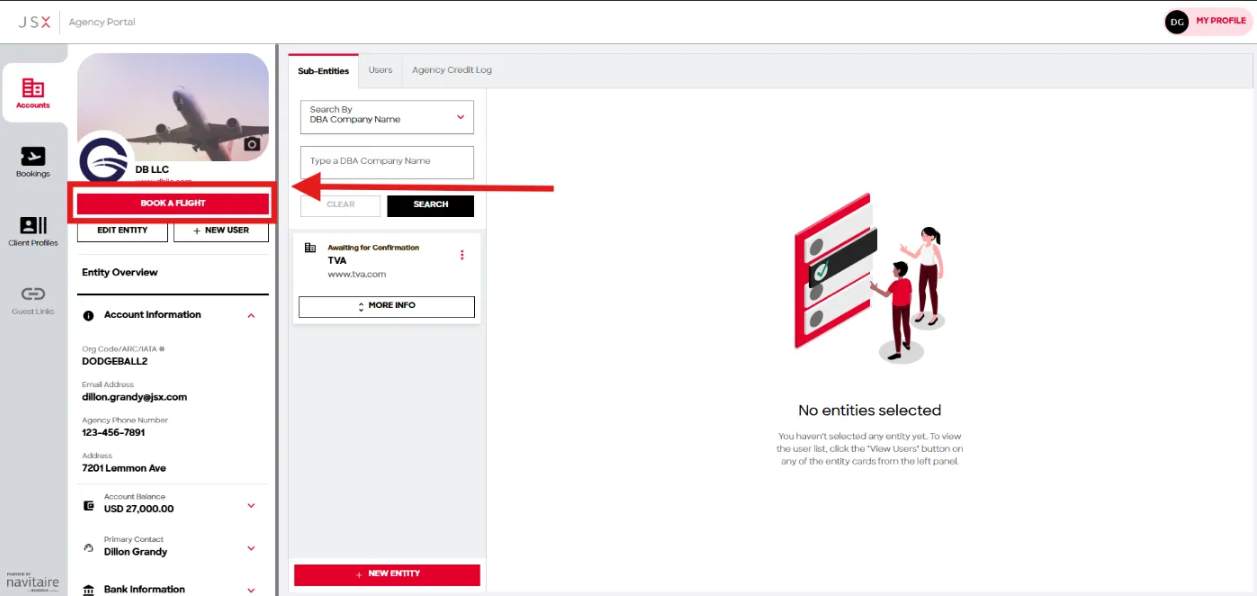
- Book a flight, edit your entity, or add a new entity
Adding & Managing Users
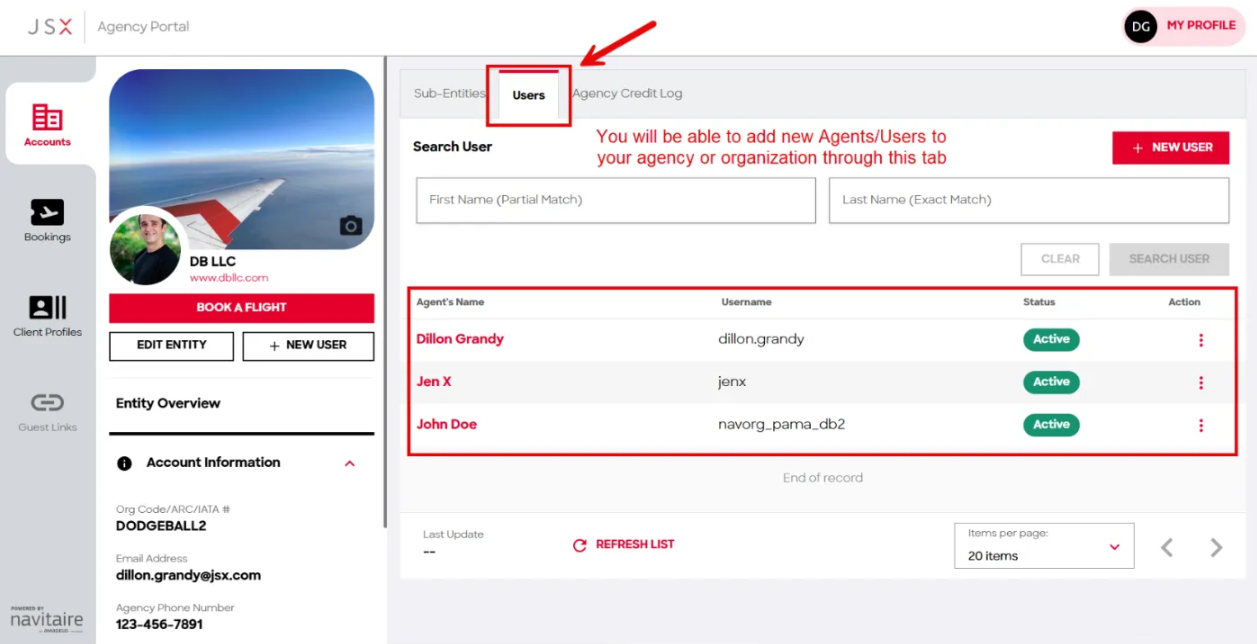
Open the Users tab to add the agents who will be booking for your customers. Click New User to add someone. To suspend or terminate a user who no longer works under you, click the three dots to the right of their row.
Setting Up Client Profiles
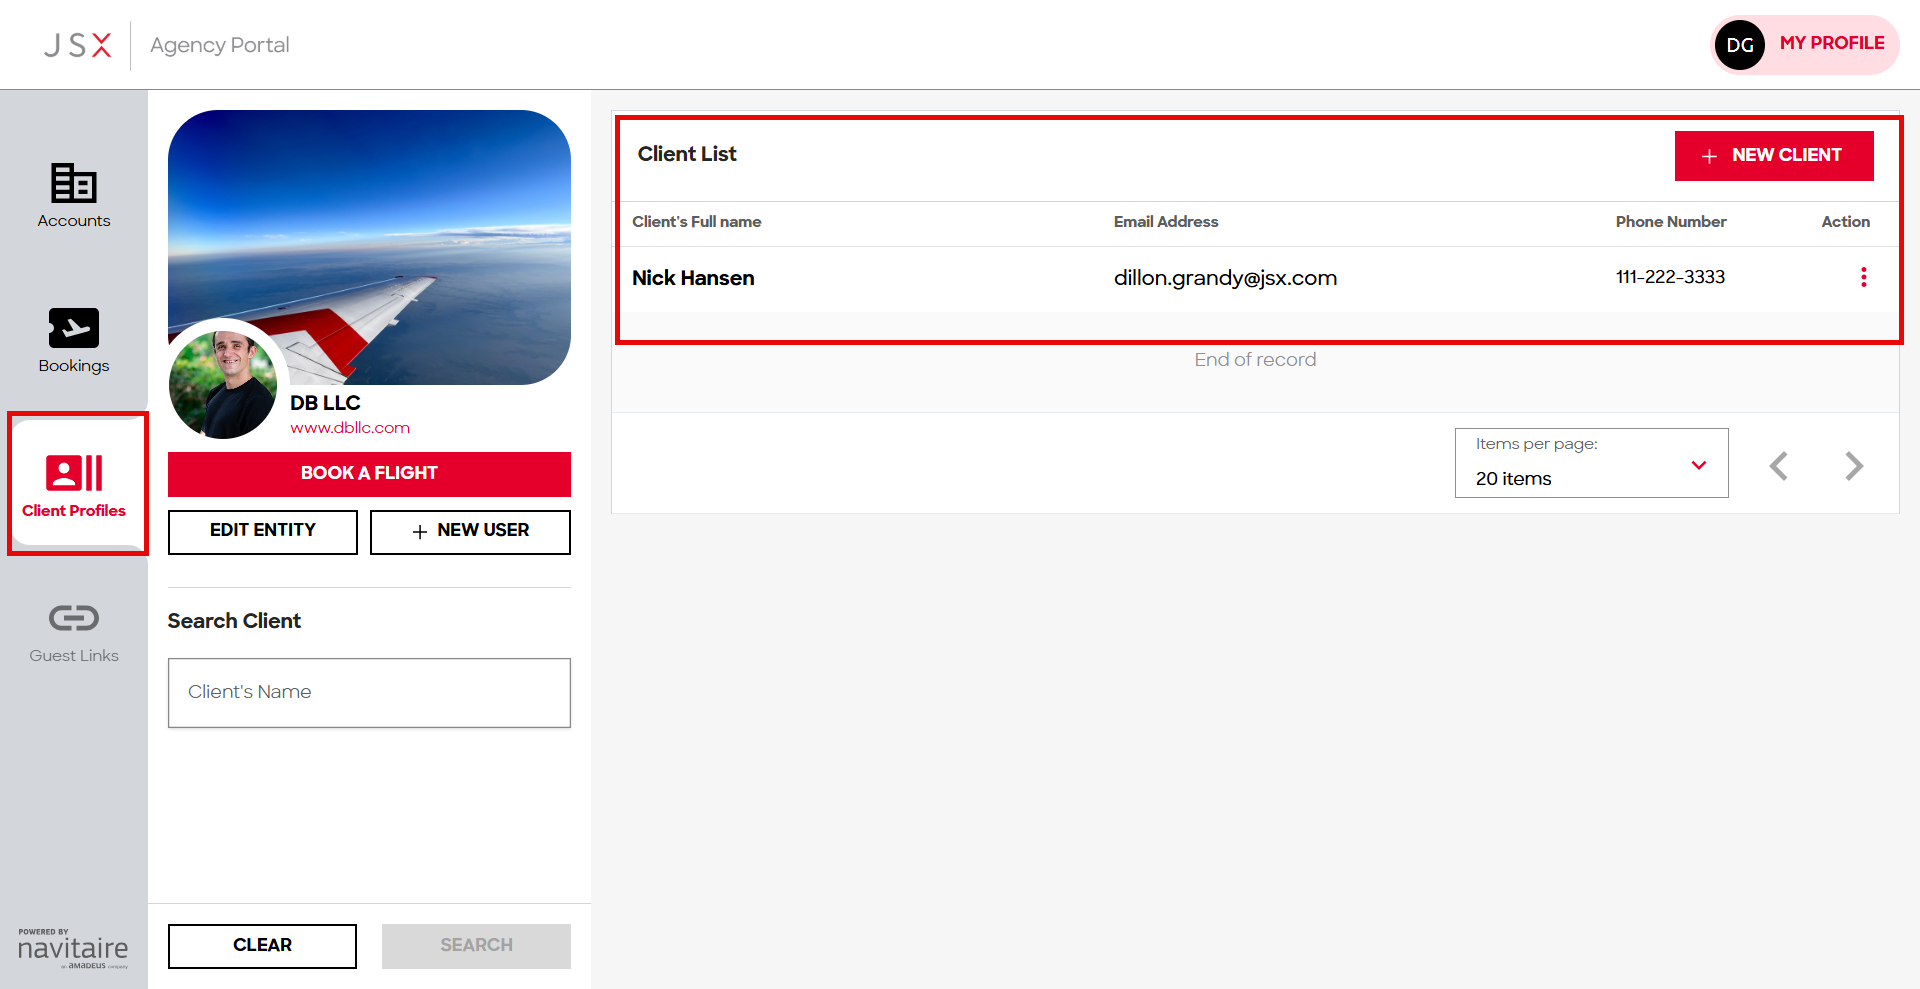
Select Client Profiles in the left navigation to see your Client List. Click New Client to add a customer you book for, storing their name, email address, and phone number. Use Search Client to find an existing profile, or the three dots at the end of a row to edit or remove one.
Viewing Your Bookings
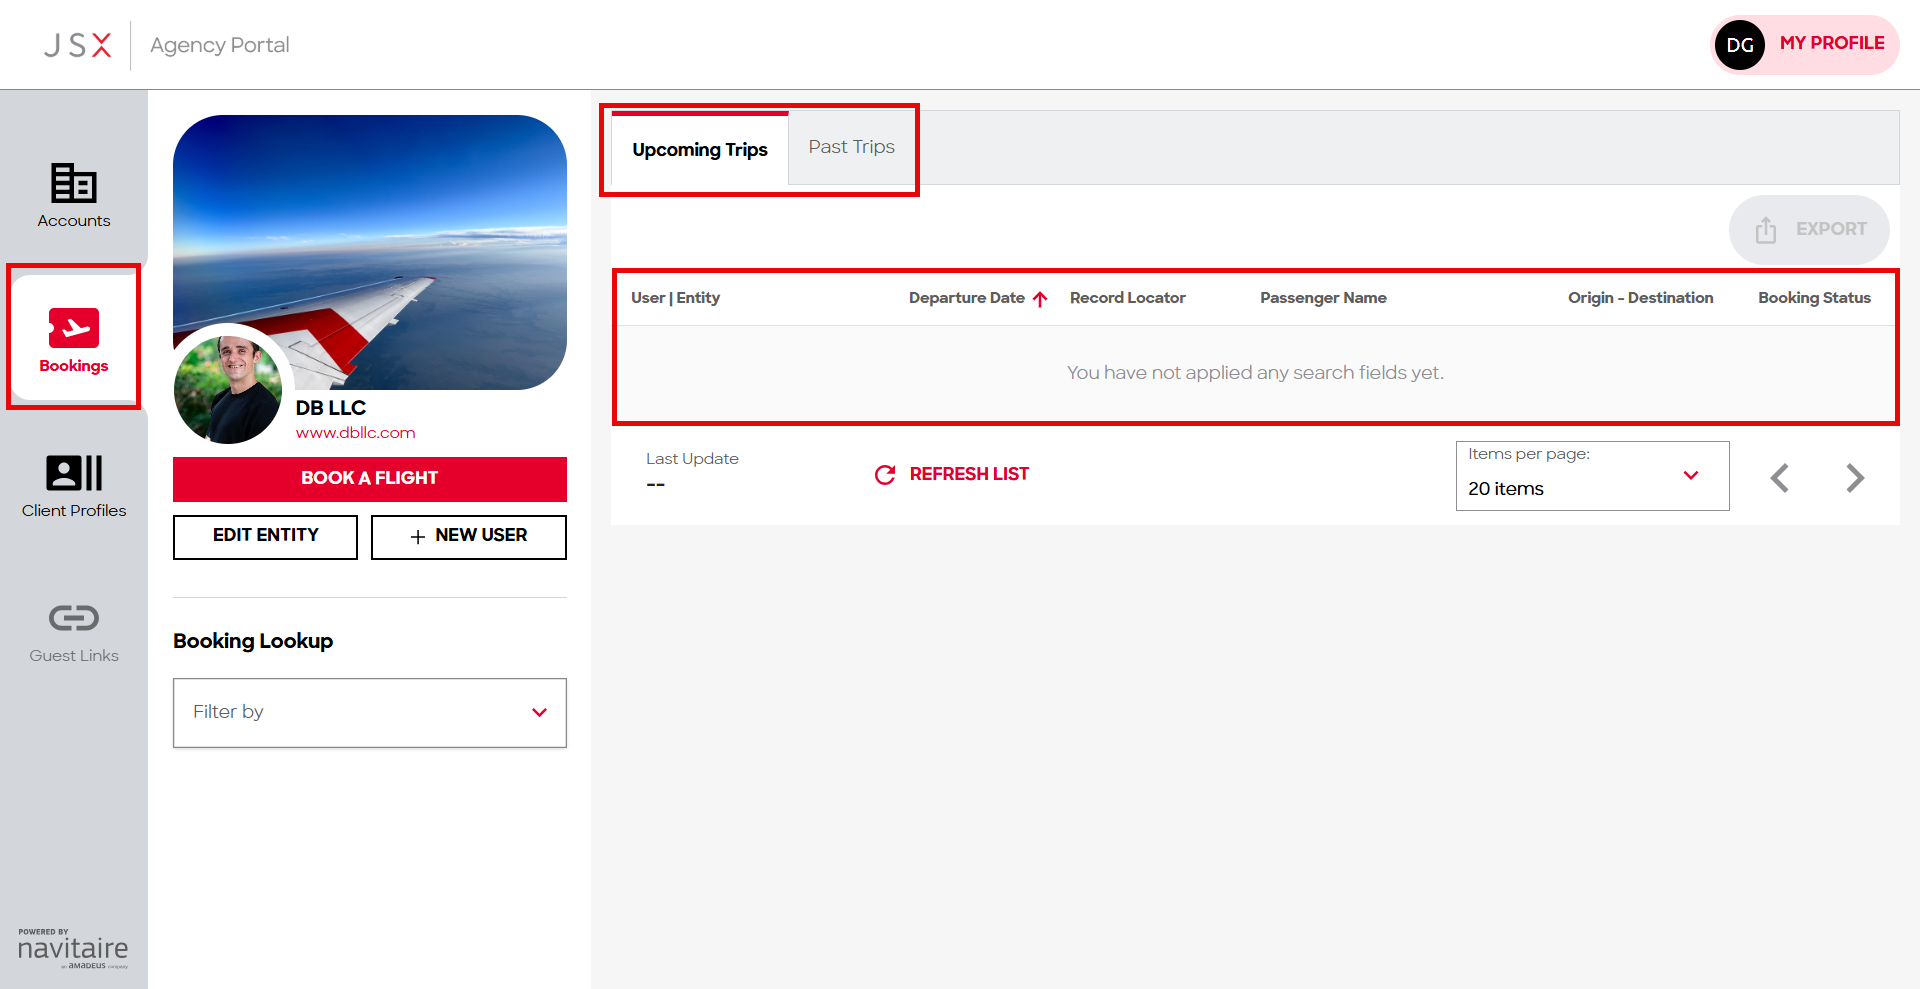
Select Bookings in the left navigation to review every booking made under your organization or agency. Switch between Upcoming Trips and Past Trips, and narrow the list using Booking Lookup filters. Results show the user or entity, departure date, record locator, passenger name, route, and booking status. Use Export to download the list.
Agency Credit Log
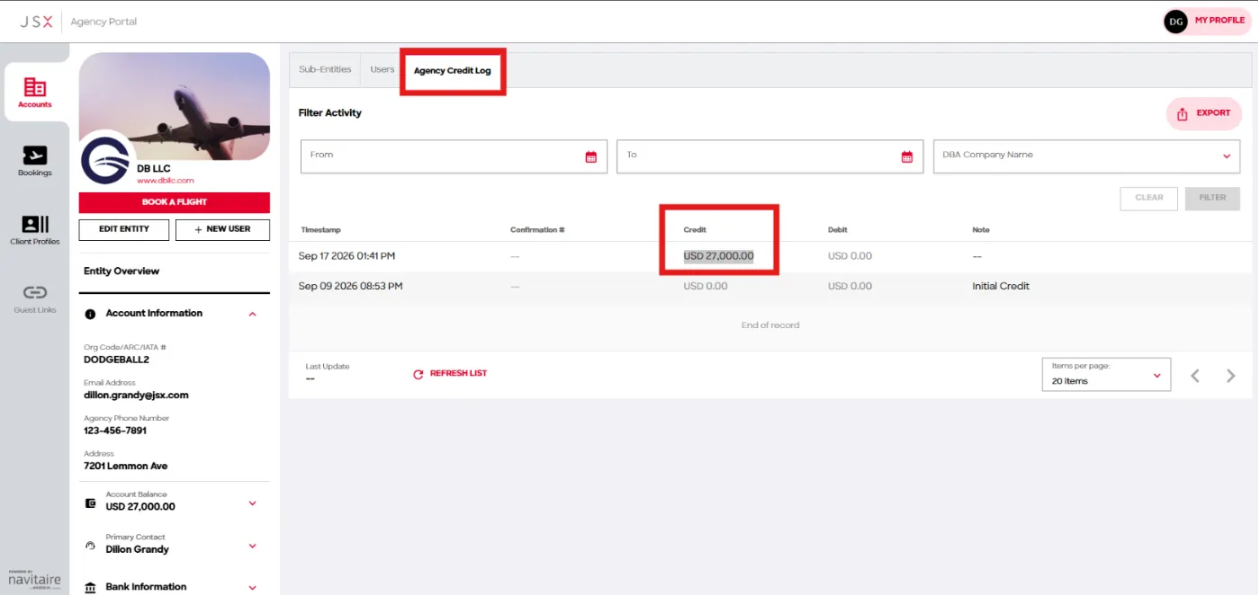
Open the Agency Credit Log tab to see the funds you have loaded or have active in the portal to spend, and which confirmation numbers they apply to when you confirm a booking. Filter by date range or DBA company name. Like the Bookings tab, the credit log can be exported to an Excel file for your organization's or agency's reporting.
Booking a Flight
When you are ready to book for a client or a member of your organization, click Book A Flight in the Agency Portal. This takes you to JSX.com to complete the booking.
Booking on JSX.com as an Agent
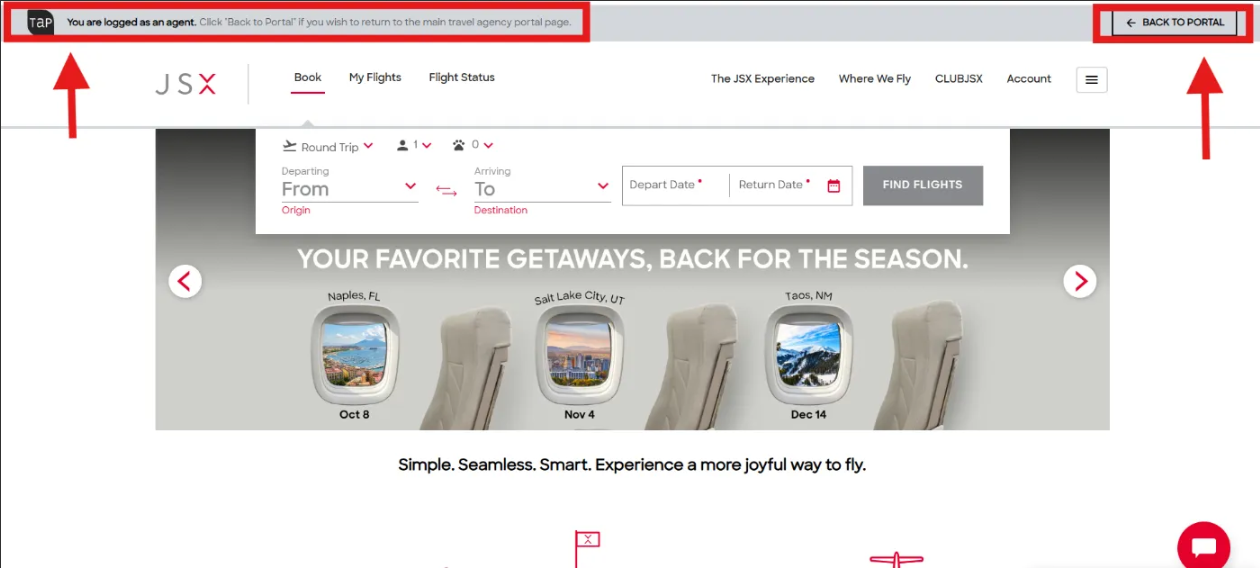
On JSX.com, a banner at the top confirms you are logged in as an agent coming from the Agency Portal. Use Back To Portal at the right of the banner at any time to return to the Agency Portal.
Selecting Your Client
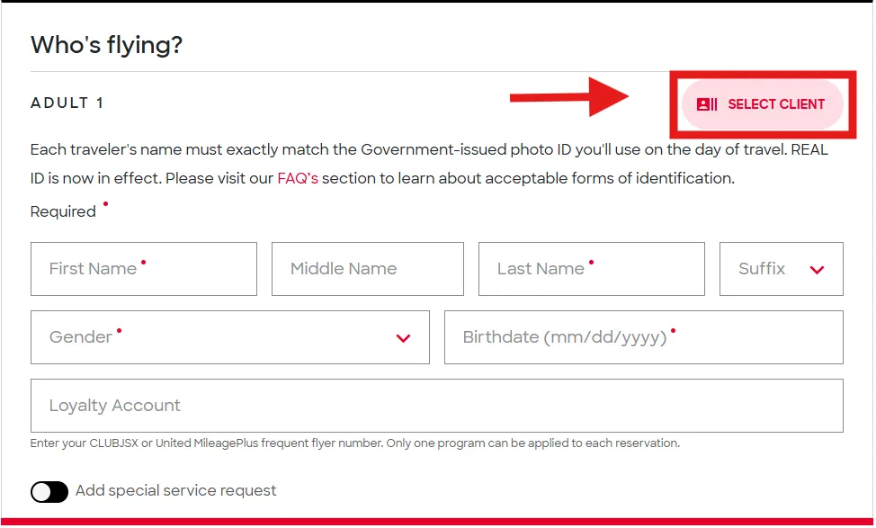
On the Who's flying? step, if your client already has a profile saved in your organization or agency, click Select Client to fill in all of their traveler information automatically.
Seats, Payment & Confirmation
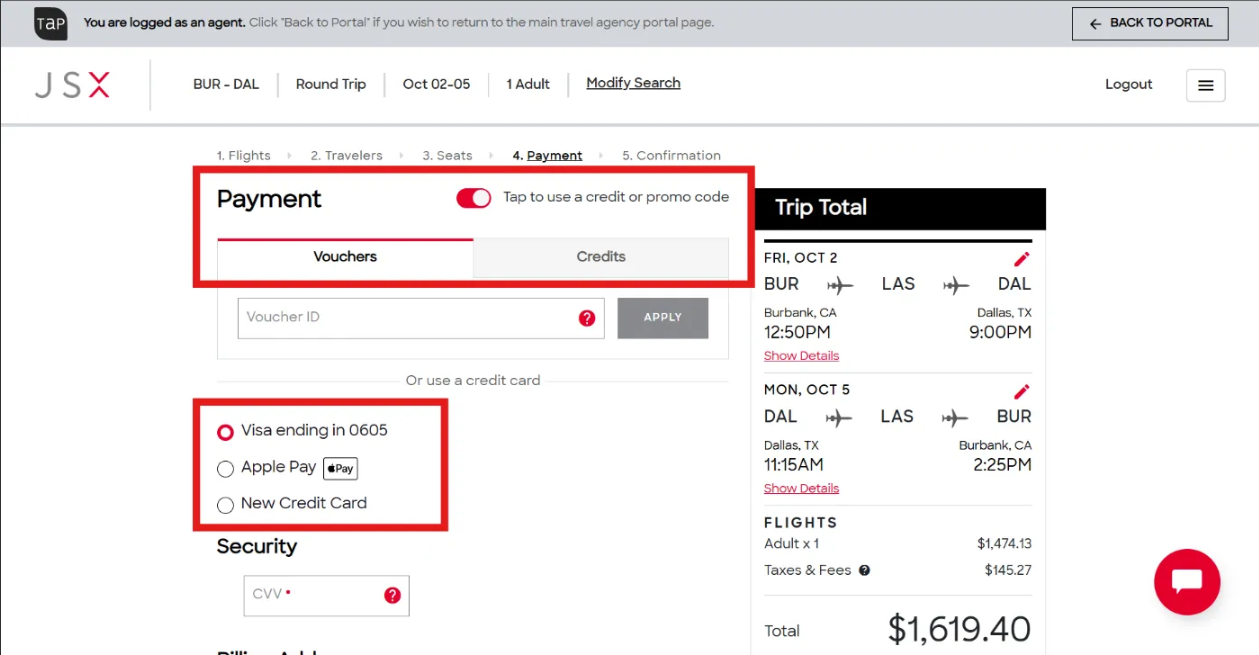
After selecting your client, choose seats for the flight. You will then reach the final screen to pay and confirm travel for your client. Payment options include:
- Vouchers or Credits on account
- The credit card on file with your organization from initial setup, which syncs automatically
- Apple Pay or a new credit card
Need Help
Questions about registration or the status of your approval? Email sales@jsx.com and our Sales team will follow up.